Molding and Casting
This project was associated with the DIY Design and Manufacturing class I took as a masters student at Carnegie Mellon. This project is a continuation of the ergonomic grip project. The goal of this project was to produce the previously designed bottle cap with a more hands-on and friendly material. The clay was a perfect medium for design exploration, but now it is time to present this piece with a more production-like material such as casting resin.


Part Preparation
Before beginning this process there were a few preparation steps that needed to be completed with my clay piece. The first step was to close all gaps off on the inside of my piece. The silicone used to create the mold starts off in liquid form and it will flow into all cracks and crevasses which is great for capturing detail but can cause issues if the desired location of the silicone is not properly planned. After the internals of my prototype were closed off from the silicon, an extra layer of clay was added to the top of the part. This will result in a larger then desired top to my piece. This is done intentionally so there is removable material for finishing touches after casting.
Mold Design
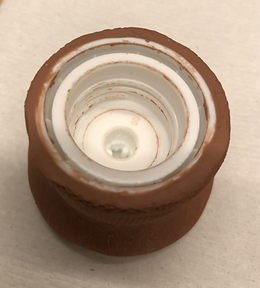
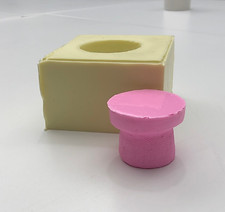
In order to cast multiple parts a silicone mold needs to be created specifically for that part. To do this, the part needs to be placed in a hollow box-like structure. There needs to be enough space around the part so a thick enough boundary can be created that will give the mold rigidity for the casting process. It is also important to take into consideration how many mold pieces you will need to create, 1 piece mold, 2 piece, etc. This will depend on the geometry and detail of the part you are trying to reproduce. For this particular project a 1 piece mold was sufficient to capture the shape and details. Sometimes it can be difficult to remove a casted part from a 1 piece mold but due to the flexibility of the molding material (shown with a demo mold in the pictures) I felt I would be able to successfully remove my casted parts from a 1 piece mold. After finalizing the mold dimensions I laser cut the box pieces and used hot glue to build the mold box. The clay part was then placed in the center of the shell.


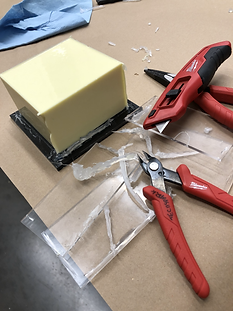
Mold Pouring

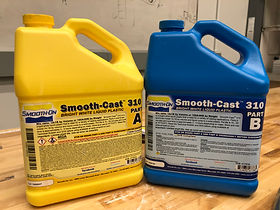
Now with the part placed and box edges sealed it is time to pour the silicone to create the mold. The silicone used in this project is Smooth-On brand and it comes in two parts. After doing some math to figure out how much total material is needed, the amounts of each part can be calculated and then mixed together. After mixing, the liquid silicone is put into a vacuum chamber to pull all the air bubbles out of the material that are created from shaking and mixing the two chemicals that create the silicone. Once all the air bubbles have escaped, the part is lightly coated with spray release so it can be removed after the silicone cures, and then the liquid silicone is poured over the part.


Mold Removal
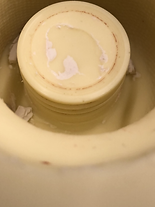
After the silicone cures the sides of the support box can be broken off and the original part can be removed from the mold. The mold can then be cleaned up to remove any unwanted debris such as clay pieces or hot glue.


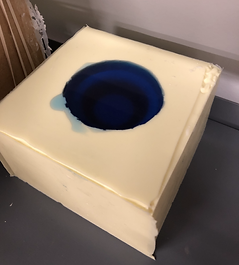

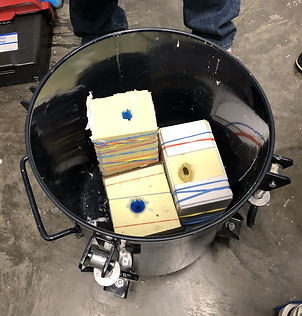
Casting
With the silicone mold complete it is now time to create plastic parts with resin. The resin used was also Smooth-On brand and again required the mixing of two parts. Once the two parts are thoroughly mixed the liquid resin is poured into the silicone mold and left to cure. Depending on the complexity of the shape being casted it can sometimes be beneficial to make use of a pressure chamber during the curing process to help reduce, and hopefully eliminate, air bubbles.

Part Removal
After the resin has cured the part can be removed from the mold and a new one can be made following the same process.


Sanding
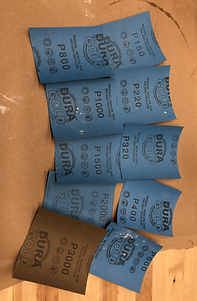
I made a handful of these caps out of different colors for fun but ultimately I picked one of my caps to further refine with sanding. The belt sander was used first to remove the majority of the unwanted material and then sand paper was used to really finish off the surfaces well and make them smooth to the touch (excluding the textured surface that was purposely not sanded). Different levels of sand paper were utilized to make the finish as nice as possible.
Part Progression
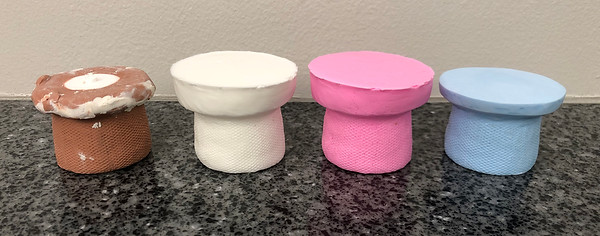
This image shows the original clay part, a few of the raw casted parts, and then the final sanded part.
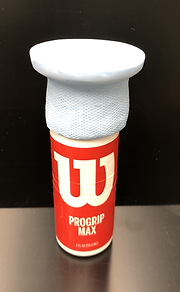
Final Project Results:
Here are the results of all my hard work!